Add a G-Suite/Gmail id on Mystrika
Knowledge base
>
Add email ids
>
Add a G-Suite/Gmail id on Mystrika
This article guides you through the steps of adding your G-suite/Gmail address to Mystrika for warmup.
It involves 3 steps.
- Enable IMAP settings.
- Enable 2 Factor Verification (2FA)
- Create an App Password
Enable IMAP settings
New accounts on G-suite/G-workplace/Gmail usually have IMAP enabled, but older ones might have them disabled. Let's enable them.
- Go to G-suite/Gmail
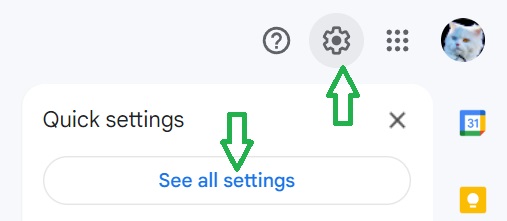
- Click on Settings in the top right corner, the See all settings.
- Click the "Forwarding and POP/IMAP" tab
- In the "IMAP Access" section, select "Enable IMAP".
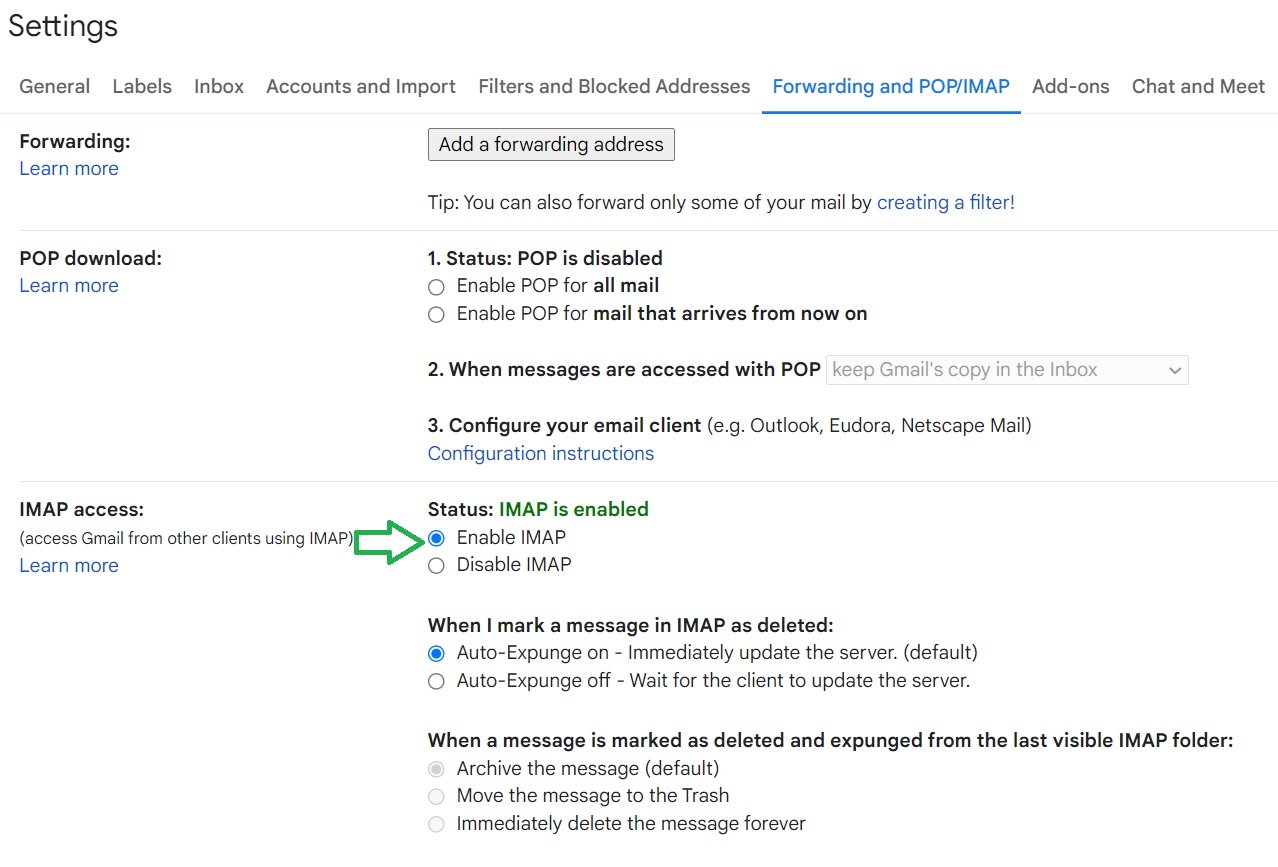
- Save Changes
Enable 2 Factor Verification
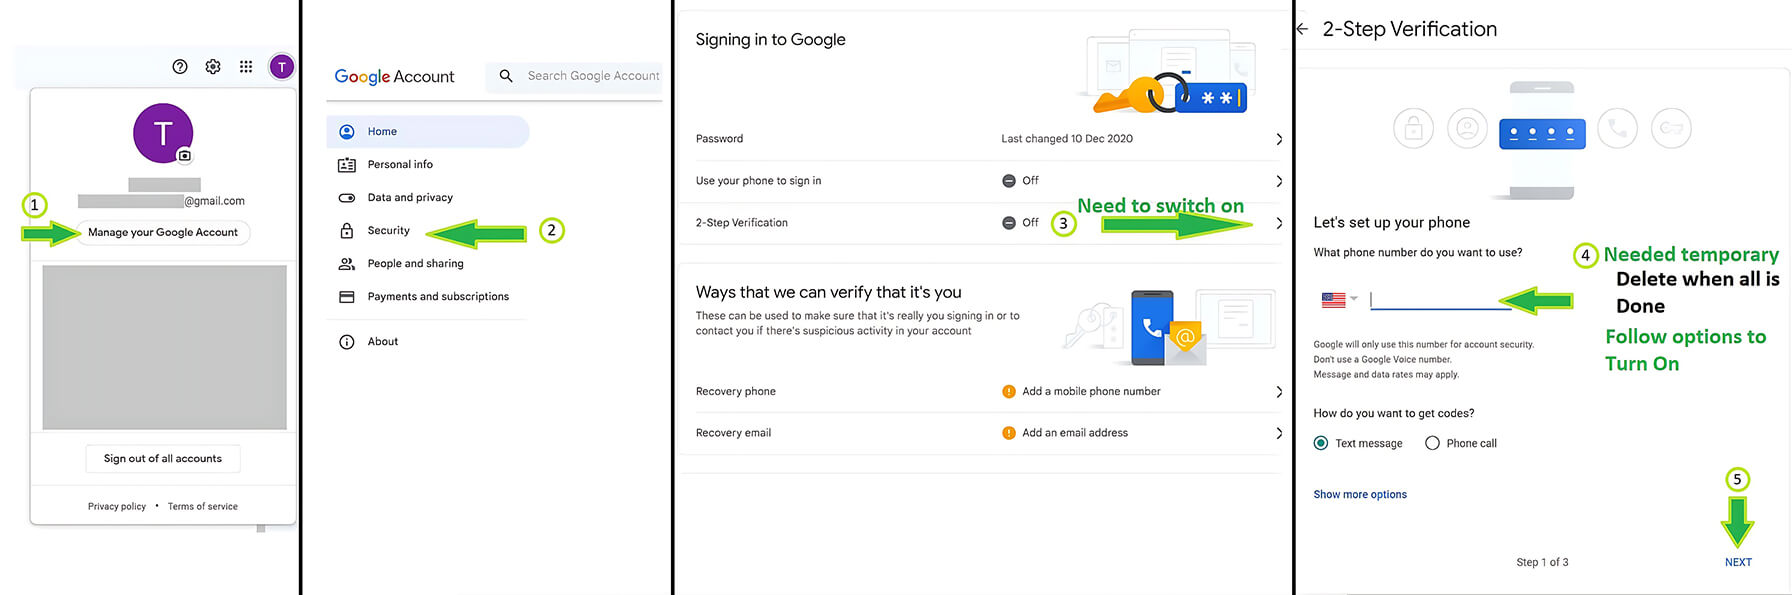
- Go to Security Settings and click on "Two Step verification".
- Click GET STARTED
- If it prompts to login, please login again.
- Set up your phone for Two Factor authentication
- Enter the code you've received on your phone number to confirm.
- Once you've confirmed click TURN ON
Create App password
App Password option has been moved under 2-step verification now
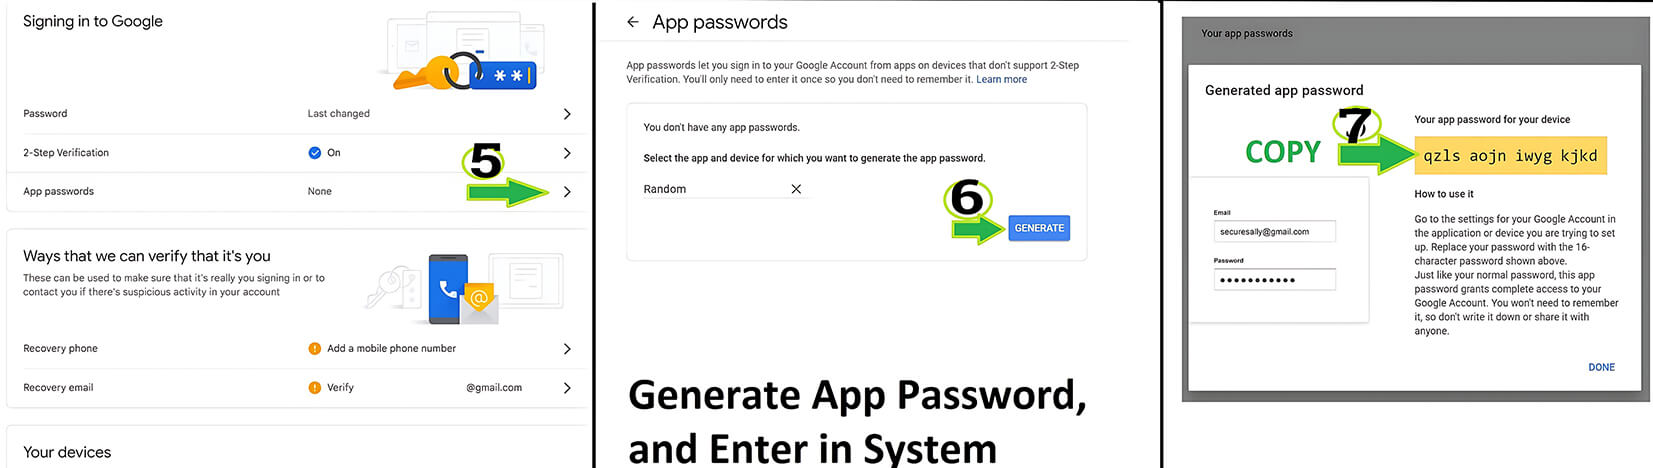
- Go to Security Settings and click on "App passwords".
- If it prompts to login, please login again.
- Select App as Mail and Device as Other (Custom)
- Enter anything for the name, it doesn't matter. For tracking purposes you can enter Mystrika.
- An app password will be automatically generated. COPY and SAVE it. We will use this in Mystrika.
Connecting your account to Mystrika
- Go to Mystrika Dashboard
- Click on "Add Email ID"
- Enter "Name on the Email Address"
- Enter "Email Address"
- Select type as "G-Suite/Gmail"
- PASTE the App password that you copied earlier from Google accounts.
- Mystrika will automatically validate the credentials and add account successfully if all goes well.
Just sit and relax, stats will show up next day.
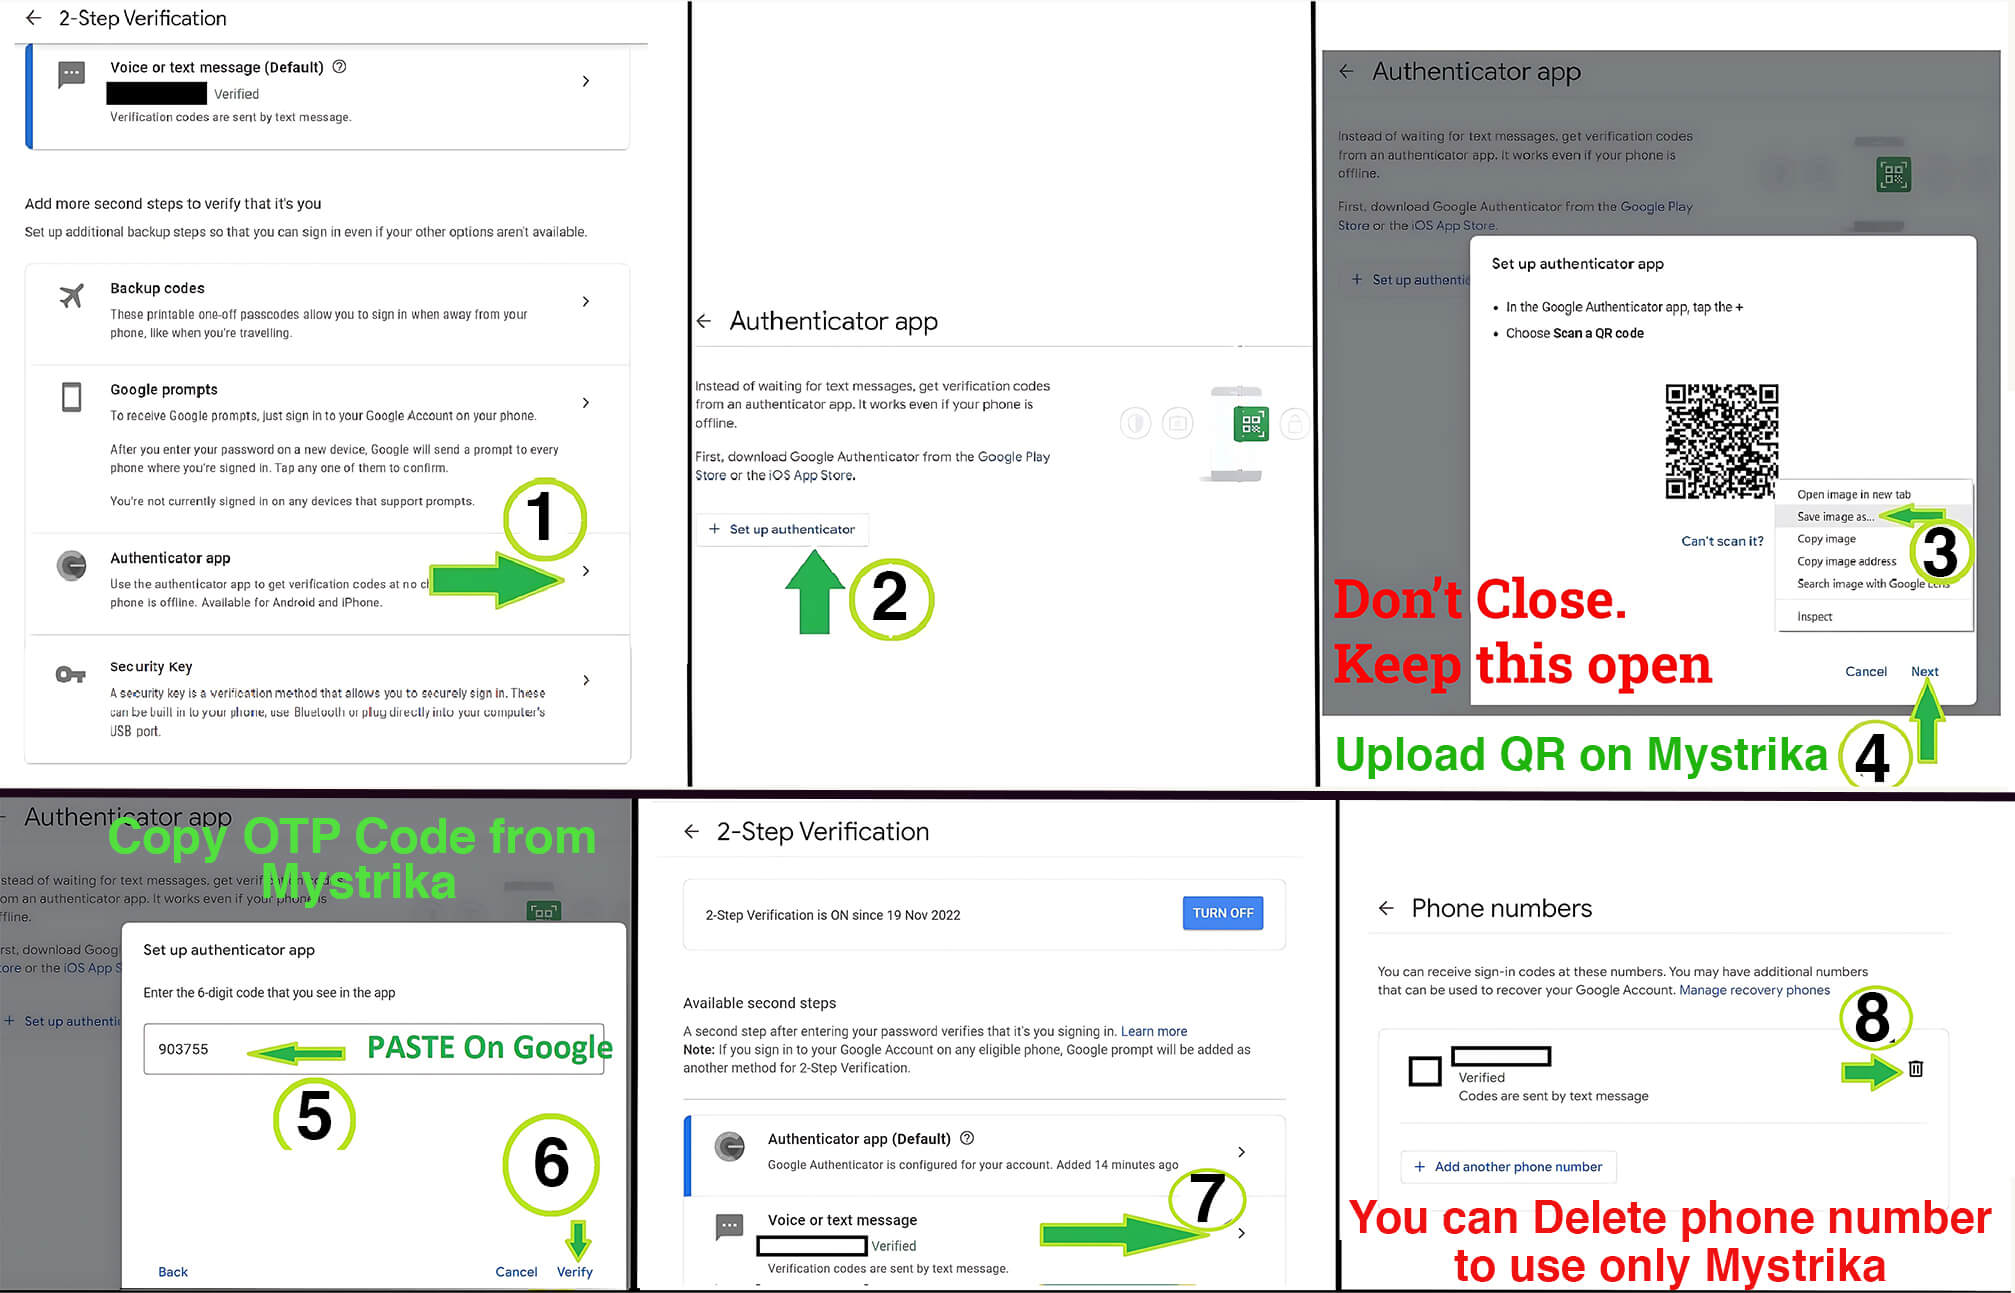
(Optional) Tie G-Authenticator to Mystrika for OTP
- Go to Mystrika Dashboard
- Click on four dots for menu next to your G-mail/G-suite email id.
- Click option "G-Authenticator"
- Goto Google Security Settings and click on "2-Step Verification".
- Select Backup Codes and Save them in safe place.
- Go back and Select Authenticator App "G-Suite/Gmail"
- Click option "Setup Authenticator" or "Change Authenticator App". Note : If you change app, old one will not work anymore.
- Right click on QR Code and Save image.
- Upload the Image on Mystrika, at Step 3 page and click Update Authenticator.
- COPY the code from Mystrika and PASTE the code on the Google Accounts page at Step 8.
- If Google verification succeeds for the code, you can generate OTP anytime from Mystrika UI.
Note : If you aren't able to connect your email address
- Check if you have IMAP enabled, as per process above.
- Confirm if you are using "App Password", and not your login password.
- Use an Email Client (like thunderbird) and check if your email settings/credentials are actually working, before reaching to Mystrika Support.